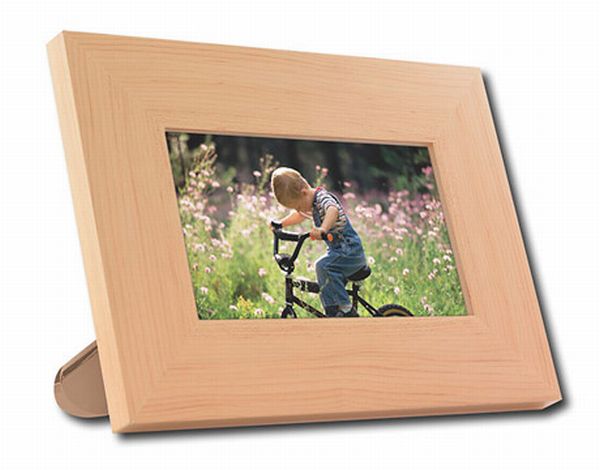
Using recycled wood can give us almost the same utility of wood at a much lesser price. This might seem like a new concept, nevertheless, it isn’t so. No, we are not talking about using wood to generate electricity. Thanks to the trend of sustainability, such products are taking the market by the storm. No matter whether it is furniture, some decor item or something else, you would find a recycled wood version of everything. Well, if you don’t believe that check out the list of the products that are taking wooden recycling to a brand new level. However, first of all, let us take a look at some reasons why you should opt for recycled wood products.
Why opt for recycled wood?
Since it takes so much time for a tree to grow, it would be a pity if we even waste old wooden products. With the increase in the population, there is an increase in the use of wood and wooden products. This has led to deforestation and increase in the global warming. It has become extremely important to device innovative methods to recycle the wood so that we can preserve more and more trees and thus the environment. Recycling wood is not a new technique and had been used since long.
Recycling the used wood into boards, panels and other wood products is being practiced for centuries. However, the real need for recycling wood has never been felt as strongly as the present times. In the last century, the residue of wood has increased tremendously. Therefore, the new way to recycle and reuse the wooden material is coming into action.
For example, the preserved wood products that contain approved pesticides, can be used in commercial wood products. These remain in contact with the ground or water. In addition, these help in increasing the life span of the wood from 20 to 40 years and even by 50 to 60 years in some cases. Preserved wood is also used to make paper and carry bags. Wood is a natural product that is reusable, renewable and recyclable. Recycling of wood has now gone into innovation. Moreover, new products are being manufactured that are not only elegant but also durable. Let us have a look at at least 10 of them.
10 Innovative products made from recycled wood
1. Fashion collection biomimicks snakeskin using recycled woodchips

Fashion has always been related to expensive and stylish clothes. However, a British fashion designer has used her imagination. She has utilized plywood chips (after laser cutting) to design a beautiful collection for women. With hand stitching to sew the pieces together, she has woven a beautiful dress in a natural snake skin pattern.
2. Egg-shaped salt and pepper shakers made of reclaimed wood

This is certainly going to increase the beauty of your dining table. Made up of recycled walnut wood from furniture, these salt and pepper shakers and beautifully designed egg shaped pieces, are plugged with natural corks at the ends. To make a distinction between a pepper and salt shaker, the salt shaker is painted with a low VOC milk paint.
3. Waterproof Ceylon paper pottery made from sand paper & recycled wood

Pottery has always been associated with ceramics, but here is a new wood and paper-based pottery that has changed the notion forever. The company called Ceylon Paper Pottery has made beautiful pottery sets from recycled wood, and sandpaper that is free from toxic chemicals or varnish. Moreover, these are waterproof too. The Sri Lanka-based company, mainly run by women, brings this wooden pottery in various attractive shapes and sizes. The main attraction is the thin walls, double sided items and availability in varied sizes.
4. Creative furniture made from recycled wood

Patchwork furniture that is made of recycled wood, appears really appealing in interior settings or any other part of the room. This is a creation from designer Amy Hunting. Her recycled wood furniture designs include a chair, a book box, and 12 different lamps. Looking at the creative designs of the bookshelf, it can be placed in different orientations. When flipped upside down, the legs offer further shelving. Stacking of the book box one over the other is also available. If required, it can be mounted on the wall too. The wooden lamps are also creatively made individually from a single block of reconstituted wood to give it uniformity and creative look.
5. The SMP lamp by Sergio Mendoza uses recycled material for innovative designs

Sergio Mendoza of Spain has designed a beautiful set of table lamps from the waste of wooden crates that are used for carrying fruits and vegetables. These wooden boxes were of no use once the fruits and vegetables were taken out, but Sergio’s creativity gave them a new life. The manufacturing involves mainly recycled wood and other basic material. The material used is also different than the conventional lamps, but the shape has been retained in order to keep it convenient to use.
6. Salvaged wood stools made from pieces of Thomas Edisonâs factory

Manufactured in America from the recycled wood, these limited edition stools are inspired by the Thomas Edison’s old phonograph factory in London. Various pieces of different shapes are individually handcrafted by the master craftsmen. As mentioned, they are available in various shapes and sizes but since it is a limited edition, it is difficult to get the same piece if waited for long.
7. Red Hot & Green is Mya Sustainable Lingerie by g9.8

As soft as silk this Mya lingerie by g9.8 is made up of recycled interwoven fine wooden fibers recycled from white pine tree pruning. The company manufacturing this lingerie is based in a small village in France and the entire product is made locally. Now, it just requires recycled lingerie to look sexy!
8. Classic games made from recycled wood and plastic bags

The Texas-based deck builder Peter Toomey is also a great designer of board games that are made from recycled wood and plastic materials. His eco-conscious self was inspired by nature and decided to preserve it by recycling the leftover composite deck boards and waste plastics. This has led to the introduction of incredible environment-friendly board games under the banner GoGreenGames.
9. Reclaimed wood desks feature vintage soda crates as drawers

Using the recycled wooden blocks to make desks and soda crates as magazine drawer, is quite an innovative concept that is inspired from nature and helps preserve it. Using these desks help reduce deforestation and preserve nature.
10. Pioneer pure-malt speakers

Various sorts of material have been used to make the speaker’s body like plastic, bamboo, board etc. Now, it is your turn to go green with the new eco-speaker designed by the giant Pioneer. These speakers are made from pure malt barrels. Made by recycling 50 year old white oak whiskey barrels, it produces an incredibly rich bass sound. Japan also awarded these speakers with Resource Recycling Technology prize.
3 DIY Projects to Utilize Recycled Wood
It is more often that we have not wistfully looked at waste from construction materials and wondered how it could have been optimally utilized. Recycling waste and making them useful is rapidly and successfully evolving as an accepted form of environmental conservation and optimizing resources. An ever-growing population of creative people is involved in recycling waste in different ways and converting them into utilitarian products. Wood is one such material which is used in most households at various occasions and leads to considerable wastage after the intended product is completed.
1) Build Shed from recycled wooden pallets
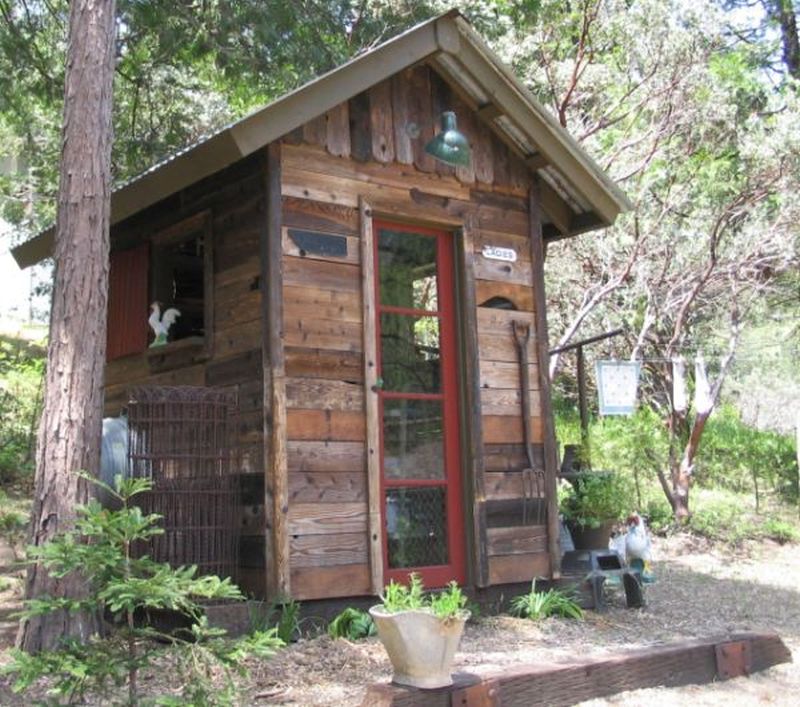 Each year wooden pallets in large amounts are thrown as wastes all over the world. Anyone can build their own lumber shed out of the cast-off wooden pallets available at a cheaper or no cost at all acquired from their neighborhood. Also, one can stopover at their local wood business stores to check out if they would sell recycled wood at a reduction price. Many people will be ready to give away old wooden pallets free of cast because they would have to spend money for disposing them. Moreover, one can make use of moderately impaired or deteriorated wooden pieces for some extent in building the shed. This will save a lot of money spent in building a wooden shed.
Difficulty Level: Moderate (Requires basic knowledge)
Time required: 2 to 3 days (based on each personâs skill for building a shed)
Resources require
- Wooden pallet
- Bricks
- Small wooden chunk
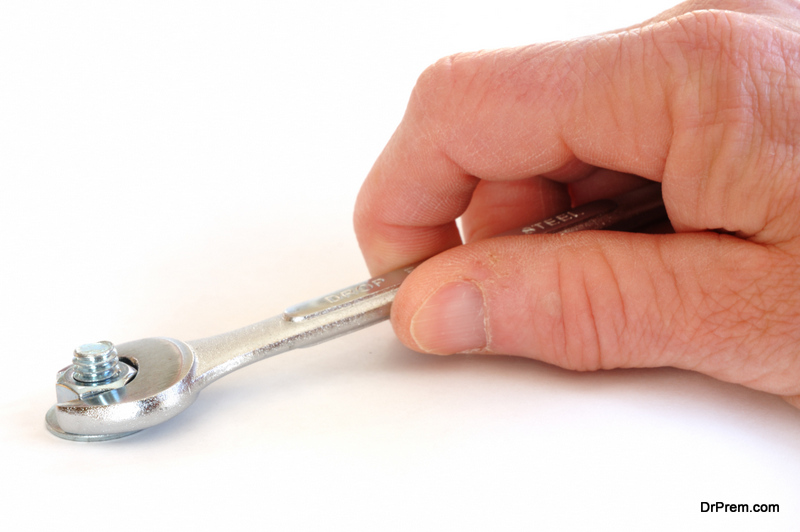
- Bolts and nut
- Power drill machin
- Nails and washer
- Hammer
- Wrenching tool
- Metal roofing sheets/ roof felt
- Rope
Instructions
- Choose an even expanse to build the wooden shed. Clean the expanse of apparent rubbish and level the area.
- Make a plan of how large the surface expanse of the wooden shed is required to be built.
- Based on the purpose of building the shed decide the height and width of the wooden shed.
- Place bricks under and above the surface to make use of it as foothold for the edge of your shed. Place the required amount of pallets upon the bricks.
- Then momentarily bond the wooden pallets together by using a rope to secure them together in their proper place.
- Next step is to link the wooden pallets using bolts. This can be done by drilling a hole with a drill bit of the similar width as that of the bolt. Now slowly knock the bolt into the drilled hole with the help of a hammer.
- Then fasten the washer and nuts onto the other side of the bolt. Now stiffen them by using a wrench tool.
- Seal in the openings of the pallet base by nailing the boards taken from among the wooden pallets that are in good condition over the openings.
- Make a wall structure by fixing the pallets all around the boundary with the bolts. Leave the required space for the door to be fixed.
- Build another frame of boundary pallets on top of the first boundary frame, from one edge to other. Hold this structure for time being with the help of a rope till they are fixed firmly with another set of bolts.
- Seal the openings with boards acquired from scraps of wood in good condition as explained in step 8.
- Construct a roof structure like whatever you want (typically a slanted roof) by placing The measured pallets above the front part of the wooden shed. Fix the wood with bolts.
- Build the roof using big pallets that cover the area of shed. Seal all the openings with wooden boards.
- Fasten roof felt to keep the roof of the wooden shed protected from all types of weather. One can also use metal roofing sheets.
- Shape a wooden pallet that suits the size of the door for the wooden shed. Seal the gaps using wooden boards as explained formerly. Fix the door with screws and pivots.
Frequently asked questions
1. Where can I get recycled lumber from?
Ans: You can search for unused wooden pieces from around your house or you can get it from people who want to dispose old lumber. Also you can obtain recycled lumber from shops that sell them in your neighborhood.
2. What is the best method to install the screws?
Ans: The best and the easiest method to fix the screws, is to fundamentally place the screw like a nail against the metal surface and striking it with a hammer to make it to pierce the sheet metal. See that the tip of the screw gets wedged in the wood. Then by using a speed drill machine with a nut drive, stiffen it in place.
Quick tips
- Before setting up the shed, clean out the area for the new shed and level it up.
- It is good to fix some old plywood over the base for better stability and foothold.
- One can also install galvanized steel roof instead of ordinary roof.
- While framing the walls use new lumber for the corners and recycled lumber for less critical parts.
- Use tar paper to protect the shed from weather if the shed is half completed.
- Screws can be fixed by placing them on washer and rubber gaskets. This will help seal the gaps that it enters.
Things to watch out for
- Paint the recycled plywood so that the shed looks like a store bought product.
- Ensure that the size of the shed is lesser or equal to that of the size of roof of the shed.
- Fixing wooden bits pinned on diagonally can strengthen the structure of the shed.
2) Build a custom shelf from recycled wood
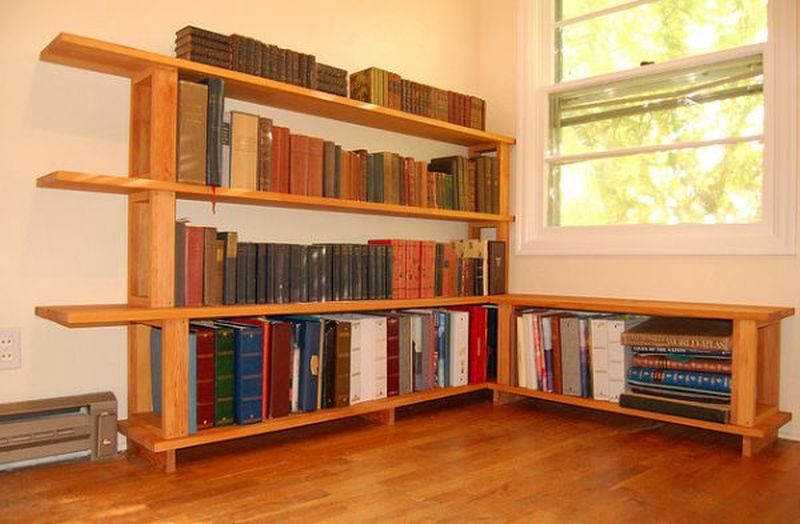 The steps explained are simple and intended for a beginner attempting creativity from waste. The project would take up approximately 5 to 6 hours of dedicated effort depending upon the consistency and sustainability factor of the creator. The approximate cost of the project assuming availability of waste wood will be around a couple of hundred rupees.
Things to keep Handy:
- A hand saw
- Hammer or for the more enterprising creator, a nail gun
- Wood Paint, Varnish and Brush
- Waste plywood or Particle Boards (minimum a quarter of a plywood sheet)
- Wood Glue
- Sand paper
- 1 1/4 inch nails, approximately 60 nos.
- Safety gear like eye glasses and gloves are recommended.
Easy Steps to build your own shelf:
1. Design:
The success of a woodwork project depends on how good a plan is created. Draw a rough sketch using a paper and pencil. Here you can determine the length and breadth of the racks to suit the available material. The orientation of the shelf, whether you would like to have a horizontal shelf or a vertical plan, can also be determined at this stage.
2. Measure and Cut:
Measure the wood according to the size of the shelf required as determined earlier in the first step, mark the line on the wood and cut using the table saw. The mantra here is to measure twice and cut once. Converting waste into further waste is not a desirable option.
3. Assembly:
After all the pieces have been cut, arrange them horizontally on the floor and place them according to the design. The process of assembly would now required adequate care for safety, as it involves driving nails into the boards and carelessness would result in injury. Start from one side and apply wood glue to the pieces to stick them together. A simple procedure would be to first create individual boxes by placing the horizontal board first, gluing the vertical boards on either side and finally placing the upper horizontal piece, thereby completing the box.
This process can be repeated until the entire assembly is glued as per the design using wood glue, which is a temporary holding arrangement for the design. Now wait for the glue to dry. After all the pieces have been assembled as per the design, the process of securing them using nails can be undertaken. Use the hammer and drive the nails on the edges joining the two pieces of wood together at equidistant spacing of not more than six inches.
4. Final Touch:
The assembled structure should now be smoothed using sand paper at the rough edges. File all the wooden pieces smooth before you paint, and remember to varnish the whole assembly after itâs painted. Adequate care should also be taken not to apply too much paint, as the wood might get swollen.
5. Installation:
It is now time to find the right place in your abode for your masterpiece. A simple method would be to drill holes through the lower, back boards, and drive screws through them to secure the shelves to the wall.
FAQs
Some of the basic questions that arise in the mind of a beginner are given below;
1. What is waste wood and where do I find them?
- Waste wood is generally found at construction sites or at a home project. The wood is generally bought as large boards and after cutting according to the sketch, invariably there are pieces which do not fit into any part of the design and is generally discarded.
2. Where do I buy the tools and items required for the project?
- All the items listed for the above project are easily available across all hardware stores selling construction material.
Things to watch out for:
As a beginner safety is the primary concern while working with wood. Use safety gear and it pays to invest in safety gear if creativity is a passion. Adequate care should be exercised while using the table saw and also while using the hammer to drive the nails into the wood.
3) How to make dining table using recycled wood
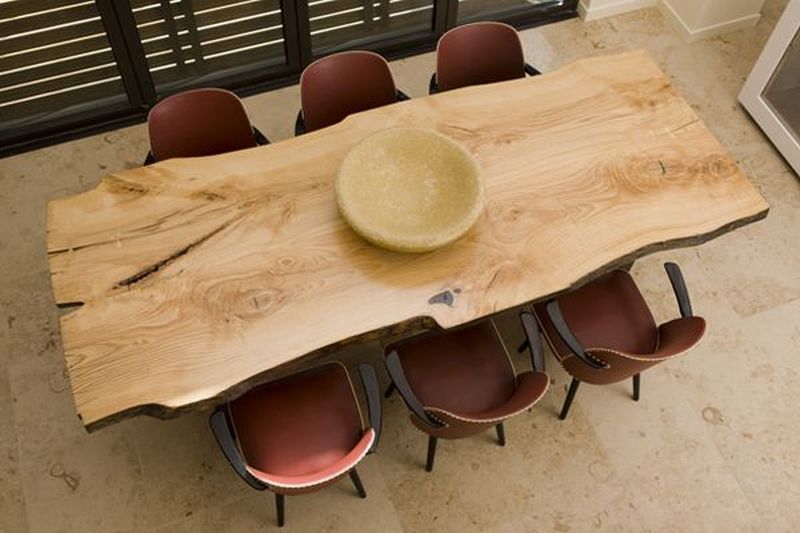 can be very expensive to have a readymade dining table. If you have some wooden blocks in your junkyard then a beautiful and cheap dining table can be made at home by using ordinary creative skills. The idea of making your own dining table might sound a bit daunting but still it is manageable. There can be many ways to make a dining table but all you need to know is just the basic idea of this project.
Difficulty Level: As this project involves some drilling, usage of saw and painting so it can be classified as moderate.
Time Required: This interesting project can be completed in a couple of hours.
Resources Required:
- Reclaimed Wood Blocks (length dependent on the size of table)
- Legs
- Screws
- Steel Wool
- Sand paper
- A drill machine
- Screw Driver
- Paint
- Hammer
- Rip saw or hand saw
- Saw horses
- Pliers
Estimate Cost: The budget of this project can vary in accordance with the parts you are using. But a budget of 100$ is sufficient for its making.
Instructions
- The very first step is to remove the nails or screws present on the board with the help of a player.
- Now cut the reclaimed wooden blocks to similar length and width.
- Next step is to line them up and if necessary to make them rectangular or square you can run them through with a joiner first and then with a table saw.
- Make a rectangular base pallet by joining four wooden blocks.
5 Attach the table top to the base pallet with screws using a drill or with the nails using a hammer.
- Screw the legs into the bottom of the base pallets.
- With the help of sand paper or glass wool make the rough and burred surfaces smooth.
- Lastly paint your table with the desired color and let it dry.
Now the table is ready to serve the meals.
Frequently Asked Questions
1. Can I make a round or oval shaped table at home?
Well to make a round or oval shaped table one need to be well trained as it requires quite skill to cut the wooden block in a round or oval shape. So if you are interested in making a round or oval shaped table then first get the wooden blocks cut in round or oval shape by a professional carpenter. Afterwards all you need to do is just assemble them accurately.
2. What should I do to make my table long lasting?
If you want to make a table of good durability then you can try these tricks like choose good blocks that are not eaten by bugs and you can also paint it or regularly oil it and even use wax and polyurethane to make it weather resistant.
Quick Tips
- Make use of a scale or inch tape to get the right dimensions.
- Make sure that all the screws are tight otherwise there might be awkward sounds and even scenarios of imbalance.
- You can use a pencil or a marker while attaching all the parts to avoid any confusion or error.
- You can use wax, oil, paint or polyurethane to make your table weather and bug resistant.
- You can also use small wheels in your table to make it easily movable.
Things to watch out for
- Make the rough and raised surfaces smooth otherwise that might catch your elbows or rip your clothes while dining.
- Paint the table to protect it from the weather and bugs.
- Attach the legs at proper and equal distances so as to avoid any case of imbalance.
- While removing nails or screws be careful or you might end up injuring your hands.
- While accessorizing your table be careful about its weight. The weight should be properly and evenly distributed otherwise it might cause trouble for you and the people dining around it.