

If you get this massive surge of inspiration, every now and then, and want to do something new to your home, you are not alone. Who doesn’t want to make their house more presentable? Everyone gets this periodical urge to change their surroundings or add beauty to It. DIY Plexi& acrylic glass decors are inexpensive, incredible, and easy to craft at home to beauty your luxury space.
Budgetary Considerations and Solutions
It is true that every time you get the surge of inspiration, it has to go down the drain because you do not have the budget to fulfill them. Where we all have instinctive home renovating ideas, most times we don’t have resources to implement them.
Don’t worry! It happens to most of us.
But, you are about to be one of those people that find out a way around it. The solution is, instead of thinking about purchasing accessories to beautify your house, craft them yourself.
In this context, Plexi& acrylic glass is one of the best materials for the DIY home décor project. To find out the best deals on the material click here. Not only is it cheap, but the fantastic colors of the acrylic sheet make it the perfect home décor material.
Home Improvement Ideas
Here are five brillianthome improvement ideas on a budget with DIY color acrylic sheet decor.
1. Acrylic Box
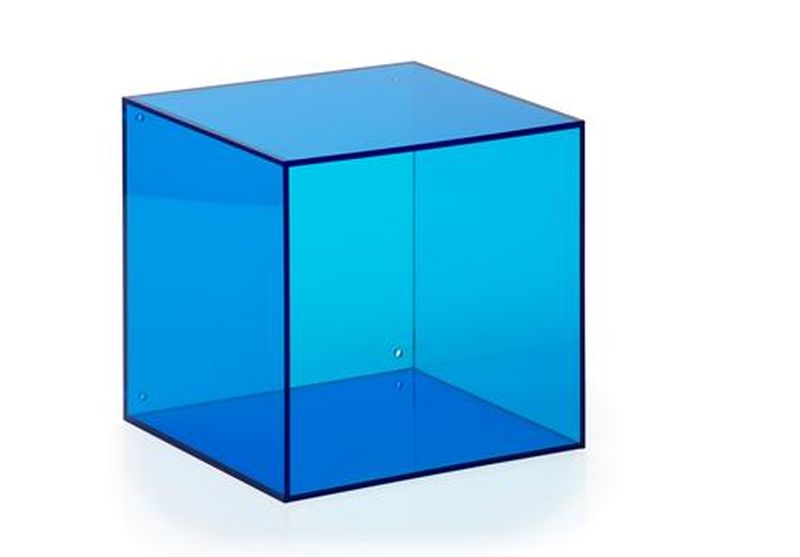 Very few people really realize how great a simple colored box can be for adding some light to your house. You can craft a simple color acrylic glass box on your own to use it for several purposes. Make a small one and use it as a pen stand. Or make a large one and use it for your child’s stuff toys.
How to make an acrylic box?
This DIY box is the easiest on this list and yet so impactful in your house. All you need to make this box is an acrylic sheet of your desired measurement, and you can get to work with a few essential tools.
Use a scale to measure the length, a plastic cutter to cut the acrylic and some super glue to bring everything together. Of course, while doing all this, you must ensure that you use safety equipment like gloves, eye goggles, etc. But since acrylic is shatter-proof, you are not at any risk as such.
To begin, cut out five pieces of equal length from your colored acrylic glass. Once done, place one piece at the bottom and stick each of the other parallels to it using superglue to hold them together. Let it dry, and it will be ready for use.
2. Customizable Calendar
Most people write with dry erase markers on glass sheets around their house, be it windows or tabletops. But you always need to be careful because a little extra pressure and the surface would shatter.
So, why not have a surface you could write on without breaking but the same finish as glass. Yes, I am hinting toward Plexi& acrylic glass.
You might think that why use acrylic glass for writing, and why not make an entire calendar out of it?
You can always do it!
How to make a custom acrylic calendar?
Begin by picking a colored acrylic sheet of choice. Get your drill and set of screws and drill to attach this calendar to your wall. Get black vinyl to create square boxes for your calendar.
The first part is simple, take your colored acrylic glass (preferably yellow) and drill it to the wall. Cut thin strips of your vinyl and use stick them on your glass sheet to make seven columns and five rows from these strips. In each of the boxes, make another small box on the top-left.
On top of each of the columns write “S,” “M,” “T,” “W,” “T,” “F” and “S” for each day of the week. Every month, you are to use a dry erase marker to mark respective dates on every day.
The bigger boxes are to make your notes.
3. Acrylic Shelf
 An acrylic shelf, right after an acrylic box, is a pretty big jump in complexity, but worth it. Contrary to your thoughts, making a beautiful shelf with Plexi& acrylic glass is nowhere as difficult as it seems.
Moreover, with the excellent finish and added color, acrylic sheets provide as good a finish as glass but better.
How to make an acrylic shelf?
Most of what you need is readily available at major supermarkets, so you will not have any trouble getting supplies. What you need are two laminate shelves, and two acrylic sheets in the color of your choice.
Make four holes in the four corners of the acrylic sheet, but make sure they are not entirely on the edges. Leave adequate space. Then, place the plexiglass sheets along with the vertical breadth of the laminate shelves and drill holes in the shelves.
Use broad-headed screws to hold the acrylic glass in place at all four corners for both the sheets. Unlike a Glass sheet, the plexiglass will not shatter if you screw too tightly. However, they will crack under pressure. So, be a little careful there.
To hang the shelf on the wall, screw in some L-brackets and place your shelf on them. You can make multiple shelves in multiple colors. This way, you do not only save money but time as well.
4. Small Decorative Lamp
Lamps are the ultimate aesthetic in any room around your house. If you make one on your own, you can bet it will be the most unique accessory around the house. Although you could make a decorative lamp with most artificial accessories. For this piece, we will rely solely on original accessories.
What all you need to design a DIY acrylic lamp?
So, here is what you will need for the lamp —14 small tree twigs of wood, about the width of a pencil. You can cut them up, so they are equal in length. With these twigs, you will create a frame for the lamp.
Next, you will need a small bulb and holder with a wired connection, smaller than the twigs’ length. Then, you need acrylic sheets, the length of your twigs to form the outer shell of the lamp.
You can also get a chart paper to make decorative designs to stick to the outer shell if you like, but that is optional.
How to make a DIY acrylic lamp?
First, you use bundles of 4 twigs to make two flat squares. You can use superglue, or nails to fix the twigs together. Once you have these two squares, place the four new sprigs at each of their corners and stick them together, forming a cuboidal structure. It is the frame.
At the base of this cuboid (one of the squares you initially made) place two twigs diagonally to form a platform to hold the bulb and the holder. Once fixed, put the bulb and the holder in there. Congratulations, most of your job is done.
Now, use your acrylic glass and cut four equal pieces, enough in width to cover the four vertical sides of the frame. Just like making of the box, stick these pieces together, and your lamp is ready.
You can make the lamp without the tree twigs, but they add a special touch to your lamp.
5. Plexiglass Clipboard

Most people do not think that a clipboard is anything for home improvement.
Yes, it isn’t. At least, not in the conventional sense.
But as the number of working spaces rise in contemporary times and workstations are a necessary part of your home, clipboards become an essential part as well. Rightly so, most people tend to buy these mediocre accessories off any stationery shop, rather than putting in the effort to make them.
But if your work involves any creativity, you will soon begin to lose connection with every accessory on your work desk. Unless you made an accessory on your own. And making a clipboard is as simple as it gets.
How to make a plexiglass clipboard?
Get a piece of plexi& acrylic glass of the desired length. File the edges to make them less sharp. Then get a clipboard clip – readily available at any stationery store, and screw it to your acrylic sheet with the help of a drill.
Make sure you use a very thin bit to drill holes and not apply too many pressures, given that drilling acrylic glass is relatively easy.
Just put in the nuts, and you have a beautiful, colorful clipboard for yourself.
Final Word
No doubt making all DIY plexi glass accessories can be tricky for you as a first-timer. However, we can guarantee the satisfaction of seeing these accessories around you will help you establish a connection with them. You make your surroundings better and trendy and that in itself is enough to keep you happy.
Not to mention that you save significant money on all of these accessories if you make them on your own. Furthermore, the finish and durability of acrylic sheets make sure that all accessories last a long time.
Maybe you could even have your children try their hand at them and have some excellent quality time together. Have fun!
Article Submitted By Community Writer