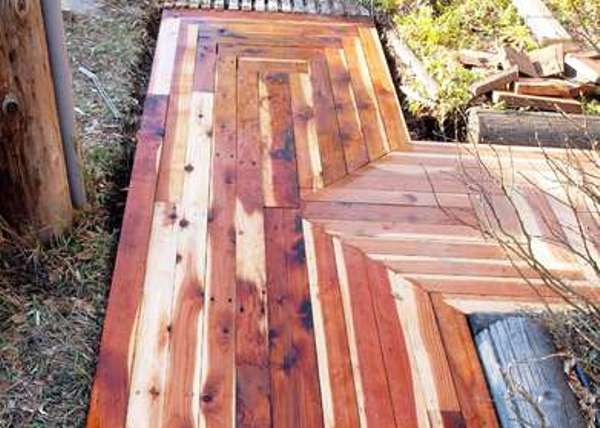

Walkways are basically boundary that marks the area where one can walk easily. These walkways are generally installed amidst gardens or terraces to demarcate the walking area from the rest of the land available. These walkways, by segregating cleaner paths for walking, keep oneâs feet out of the grass, marsh and mud that occurs frequently in the garden area. It gives you the ease to take a stroll through your garden without getting yourself messy. There are various ways by which people construct walkways. While some involve methods that are expensive, other cheaper ways are also there. A great way to have walkways that match with the decoration of our garden yet be a pocket friendly option is to use recycled lumber for your walkways.
Difficulty level: Moderate
Time required: 2-3 days
Resources required
1. String
2. Wooden Spikes
3. Tape Measure
4. Sledge Hammer
5. Shovel
6. Landscape timbers
7. Circular Saw
8. Drill and bit
9. 12 inch rebar
10. Path filler, rock, sand, mulch
Instructions
1. Cut the used wood
The first thing you need to do while proceeding further with your project of making walkways is to get hold of used wooden planks. Now, look for the appropriate one that will fit the size of each of the sills of your walkway. Next, use a table saw to cut and shape the other wooden planks so that all of them are of equal lengths. Shape up the edges by cutting them precisely with the saw and filing them.
2. Apply lubricating oil
You need to ensure that the walkway is durable enough to withstand rain and water. Moreover, you must also ensure that there is no crack in the wooden planks, which will otherwise be the possible dens of beetles and insects. Thus, apply a coating of lubricating oil or mobile as a weather guard all over the lumber planks and let them dry under direct sun for some days. Follow this with double coat of oil paint on the external surface of the planks further to seal the cracks and dents and thereby dispel the growth of bugs.
3. Tie the planks with thread
Measure the distance of the walkway and then the spacing you would allow in between each of the planks. Tie a thread tightly around each of the planks and make a connecting thread spacing according to the measurement you have taken. This thread will be a guide to the walkway as well.
4. Make the guiding plank
Dig out soil and drill in a hole as deep as twelve to fourteen inches inside the earth surface where you plan to install the walkway. Make similar such holes in a line that will follow the measurement of the plank or spike spacing that you have already preplanned and measured. Now, place each of the tied spikes inside this hole. Ensure all of them lie in equal level. When they are aligned properly, hammer them well so that they get fitted inside the holes firmly. Fill in the hole with mulch, soil and sand to hold on to these mounting sills. Finally place two bricks on each side of these mounting sills so that they do not move at all.
5. Make a side post
Arrange for planks that will be equal to the measurement of the spacing between the two mounting posts. If you cannot find anything like that, cut such a side plank from the used lumber that you have. Measure the number of such planks you will require for the walkway and cut similar such numbers of side planks. At the final stage, use nails. Next, set each of the connecting planks across the mounting posts and nail them well so that the construction is firm and strong.
Frequently asked questions
1. If I have really worn out planks, where can I use them in making the walkway?
A. Use them for the side planks as these are the ones that just hold two posts together, but are not the major frameworks of the walkway.
Quick tips
1. Smear a coating of oil over the wooden planks to prevent them from weather.
2. Apply a coat of oil paint on the wooden planks before installing them finally. This coat will seal the cracks inside the planks and prevent them from rotting due to water contact and rain.
3. In case if you find it difficult to handle the saw in order to shape your timber, get it done by a carpenter.
4. The length of the shortest timber will determine th length of planks used in making the walkway.
Things to watch out for
1. Never use a saw without a guard for cutting the timber as you may chop off your fingers.
2. Avoid using a blunt saw as that will tear the timber pieces rather them cutting them precisely.