Thanks to the rising fuel and electricity prices, people nowadays are getting into a dilemma. They are wondering what is more feasible, cooking gas or electricity. For most of us, electricity comes out as the more eco-friendly choice, however, that’s not the solution. A huge part of our electricity also comes from fossil fuels. Hence, even utilizing electricity for cooking isn’t that eco-friendly. Therefore, it is necessary that, apart from following eco-friendly cooking practices, we either generate electricity completely from renewable resources or we should prefer eco-friendly cooking utensils. Since the former isn’t viable right now, it would be best that we prefer the latter. Using DIY solar ovens can help us considerably with this.
Read More: How to build a solar oven with sun tracking
5 – Coolest DIY solar ovens
Using eco friendly, green solar cooker for cooking purpose is one of the most effective and futuristic options for the modern generation. This way you can save the domestic fuel and electricity charges as well as reduce the spreading of carbons and other harmful compounds in the atmosphere. This article will provide you information on some eco friendly solar ovens.
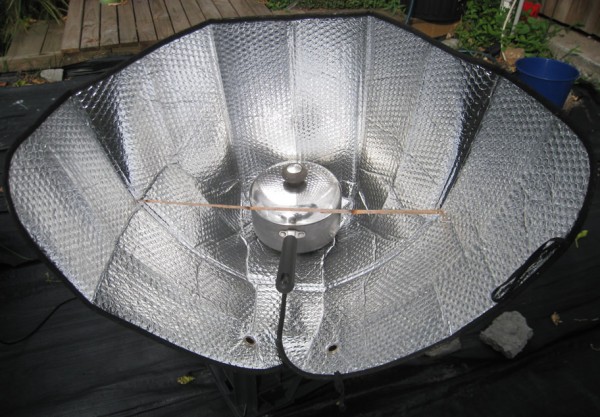
1. DIY fun panel solar cooker
Designer Teong Tan has realized the necessity of eco-friendly cooking utensils. This realization is reflected through his hybrid fun panel solar cooker. He rectified some errors of the conventional funnel solar cooker. He grabs the main mechanism of panel cooker and funnel cooker and implements the modified version of this mechanism in his new invention, the hybrid fun panel solar cooker. Thus, his green cooker eliminates all the limitations of ones that had been used so far.
The materials which are used for making this solar cooker are also biodegradable. They are cardboard, one short string, paper tape, aluminum foil and most importantly, the designerâs own sharp craft skills. The best part of the cooker is that you can alter the inclination of the panel according to the position of the sun. Once the oven is ready for cooking, you need to place the pot at the center of the cooker. You can also fold the cooker when it is not in use.
2. Teens convert pizza into solar powered ovens
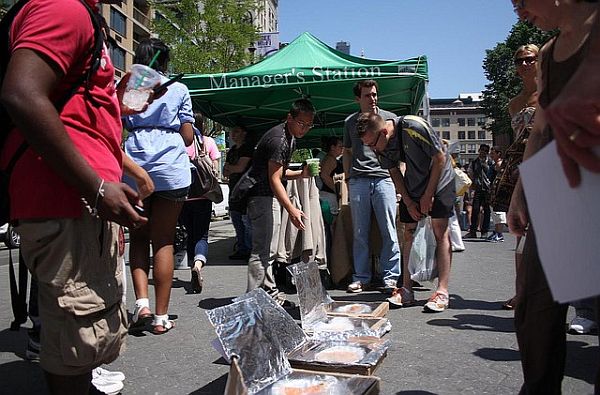
This oven is the most effective way to reduce the spread of carbon and cite ecological balance on the earth. A group of student in New York City has invented this green way of cooking for the futuristic kitchen. They have designed their own pizza oven, which does work on electricity but on solar powered. They say that this gadget can produce more than 200 degrees of temperature on a bright, sunny day, which is enough to bake pizza.
This pizza oven is covered with tin foil and it is completely a hygienic way to make pizza without any fear of getting burnt. It looks like a simple box. When you use this oven, you just need to flit up the upper portion of the box, facing the sun and put all the ingredients of the pizza at the center of the box. The upper portion of the box will start producing heat from the sun, which is sufficient enough to bake your pizza.
3. Bill Beckers do it yourself solar cooker
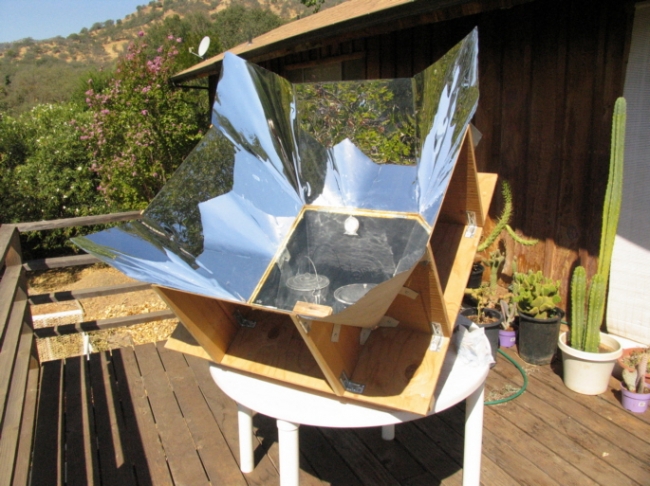
Mr. Bill Beckers made this unique solar cooker in 2007. It can produce more than 400 degrees of temperature on a cloudless day in winter or even in the bright summers. But it works as long as the sun is visible. It is made in a quite unusual way. A glass collector plate has been placed at its opening. When the oven directly faces the sun, the sunlight strikes the reflectors and it goes into the interior part of the oven and generates heat. The glass is tempered to prevent cracking due to differential expansion of heat between the interior and exterior surfaces. You can also adjust the temperature in accordance to the movement of the sun. When the sun moves across the sky, the oven must be turned horizontally towards the sun.
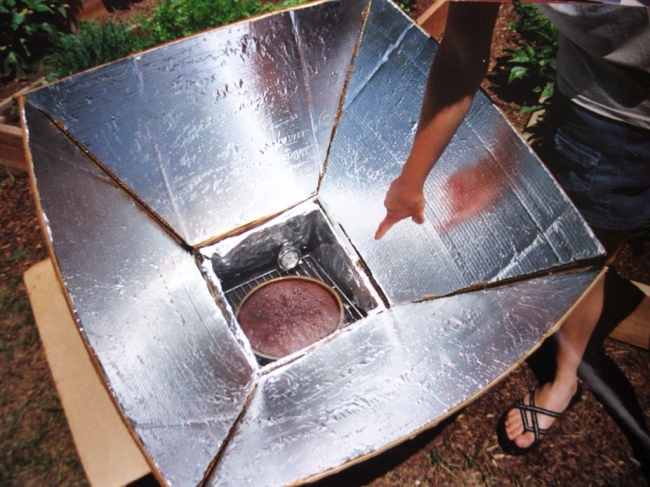
4. Cookit solar cooker made out of wood
This is another most unusual solar cooker which has been made by car sunshades and windshields. It can generate up of 200 degrees of heat within thirty minutes. If you closely follow this oven, then you will see that there is a pot which is placed inside an oven bag along with a thermometer. It is known as the glazing in the solar world. The oven bag does not touch the cooking pot at all. The pot must be placed at the center of the bag. A wire cage inside the bag expands in the internal area of the bag. This bag helps to maintain a layer of hot air all around the pot. It also helps to keep the wind from blowing across the pot and stealing its heat directly.
5. Solar cooker from old satellite dish
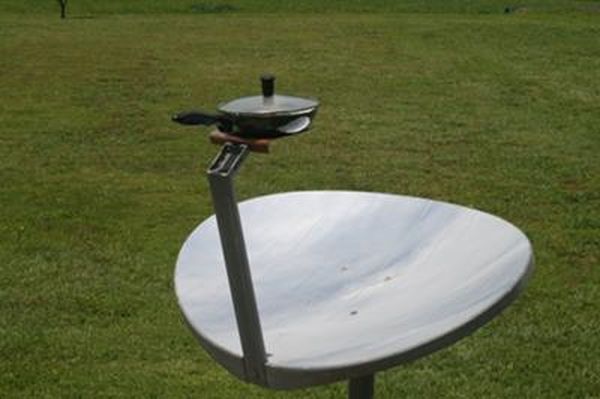
This solar cooker has been made from old and recycled satellite dishes. The old satellite dish has been converted into a cooker. You can create one for yourself too. First, fix the old satellite dish in a stand and cover it with strips of reflective vinyl. Place this dish in an open ground, at least at a height of two feet. Next, prepare a copper plate and attach it to the receiver bracket, in order to get even heat distribution for the top surface of the plate. Attach plastic sheets at the top of the plate. Now, it is ready to be used. As sunlight strikes the reflector dish and it reaches to the top of the plate, heat will be generated for cooking.
How to make DIY solar ovens in a green and affordable way
Our mouth starts to water looking at those tempting cuisine, but how often do we think of the harm we cause to our precious environment? It’s time to take up green ways of cooking to preserve our environment. How about creating DIY solar ovens ourselves in our own cozy dwelling? It will help in reducing our fossil fuel use and cooking in a more eco-friendly manner.
Difficulty Level
Easy
Time required
With all the required things at your disposal it will take just 35 to 45 minutes to create the cardboard solar oven.
Estimated cost
$ 45
What you are going to need?

- 2 medium to large cardboard boxes that fit inside each other with 3-4 inches or so of space around the sides of the box. Get obsolete boxes from any store for free.
- 1 large piece of cardboard for the reflector that is as wide as the widest part of the large box and about 2-3 feet long
1 roll of aluminum foil. You can easily find it in your kitchen. - A piece of glass or plastic fits over top of the larger box. You could use a spare glass lying at home or some store.
- Tape measure
- Razor knife
- School glue
- Black spray paint or black construction paper
- Newspapers to crumple and fill a bottom row and the sides in between the two boxes. You could get them from recycling centers.
- Duct or foil tape
- Two small pieces of wood
How to make the cardboard solar oven
- Collect all the required things and place them properly on your table.
- Cut off the four flaps of the smaller box so that they do not obstruct while working.
- Now make an insulation that helps to retain heat in the box by crumpling up pieces of newspaper one by one and lining them in the bottom of the large box.
- If you have a black spay paint, then use it to paint the bottom of the small box, else glue a sheet of black construction paper to the inside bottom of the small box.
- Cut the aluminum foil of the size slightly bigger than the sides of the small box. Apply a generous amount of glue on one side of the inside of the small box and fasten the aluminum foil a little bit extra over the top of the box to let the foil stay in place. Repeat the process for the remaining three sides.
- Place the small box inside the bigger one and crumple up newspaper one by one and fit it around the sides up to the top.
- Make the flap for the reflector by cutting out a piece of cardboard that is as wide as the widest part of the large box and about 2-3 feet long.
- Put the reflector flap a few inches down on one side of the box and then tape it to a flap of the large box.
- Cut aluminum foil of the reflector flap. Apply a generous amount of school glue on one side of the flap and cover the entire side with the aluminum foil.
- Now, carefully place the piece of glass or plastic on top of the large box and tilt the reflector in towards the center of the boxes. Your cardboard solar oven is now ready to work.
How to use it
Since our eco-friendly DIY solar ovens are ready to prepare your healthy, mouth-watering meals, so now is the time to inform you about its functioning. In order to cook something, find out how hot your new solar oven gets by putting solar oven in an open place with as few obstacles around to reduce shadows. Now, place the reflector by facing toward the sun. Then, place a thermometer inside and check it occasionally to determine how hot your solar oven gets. Now you can begin cooking your favorite dishes.