
In homes where meat is cooked, you will usually find a lot of leftover fats. These come from cooking either sausages or bacon or duck or any of the other greasy foods. Even in vegetarian homes, there will be oils used for frying which are discarded later. These fats can be utilized gainfully to fuel a lamp that could ‘light up’ your home. This project will show you how to make such a lamp.
Difficulty level :
Moderate
Time required :
One week approx.
Resources required :
- Edam cheese wax
- Decorative filler (or Plaster of Paris)
- Pencil
- Large plastic container
- Small plastic bowl
- Wick
- Cutting and shaping knife
Estimated cost :
This depends on what you have at home. Should not cost you more than $10- $20.
Instructions :
- First, we make a metal mold through which the wick would be threaded. To make this metal mold, we would need a mold made of decorative filler which is made from a wax mold. So we begin with the wax.
- Take the malleable wax that has been made from the outside of Edam cheese. Roll it into a cylinder of about 3-4 inches. Pierce the cylinder lengthwise with a pencil.
- Set the wax cylinder smoothly and then make four lengthwise slits such that the wax is split into four equal strips.
- Shape each of these four strips into petals. The wax is very malleable and pliable and it it easy to shape.
- Repeat the same process with the wax cylinder and pensil and obtain four more wax strips.
- Shape these four strips into flat stalks that connect to each petal.
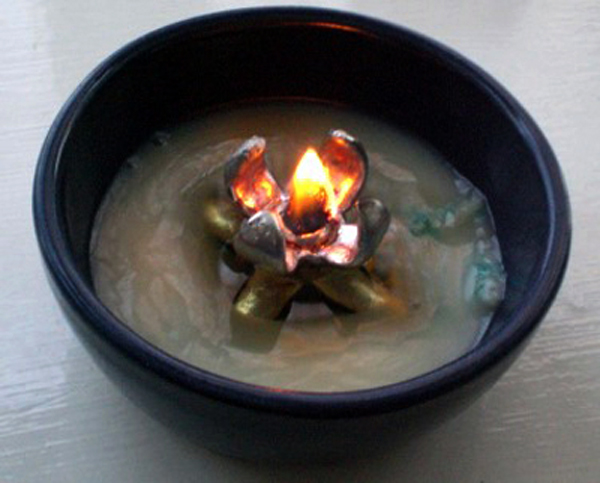
- Add on some details to the wax mold. Add four more bases for the whole structure and you have a neat mold. Please look at the image to get an idea of how the final product looks.

- Place this wax mold in a plastic container that is at least thrice as wide as the mold and thrice as tall too.
- Melt the legs of your mold and attach them to the bottom of the plastic container. They will form the pouring channel for the metal.
- Take a complete 450gm packet of decorative filler and add water to it till it becomes uniform and of a pouring consistency.
- Pour this slurry that has just been prepared from the sides into the plastic container that holds the wax mold.
- Ensure that there are no bubbles formed by vigorously stirring the slurry for a while.
- Let the mold dry. It may take a couple of days.
- Cut away the plastic container and obtain the mold.
- Dry this exposed mold for another couple of days.
- Place the mold in a bowl and place it on some warm radiators for a couple of days.
- Now, place the mold upside down in an oven and heat up to 170-220 degrees Celsius to melt out the wax.
- Prepare pewter from old metal for casting. (How to prepare pewter is the subject of another tutorial.)
- Melt the pewter and pour it gently into one of the filler holes at the bottom of the matrix.
- Cool it for about an hour or two and then break away the mold.
- Place the metal model in a plastic bowl and thread a cotton wick at its center.
- Melt cooking fats and pour them into this plastic bowl till base of the petals.
- Light up and use the lamp.
Frequently asked questions :
Q1) The fat in the reservoir gets solidified soon. I have to keep heating it over hot water to ensure that it remains molten. Is there any way to solve this problem?
Ans: You can definitely solve this problem with some intelligent designing. Curve the wax petals inwards as you make them. When this shape gets impressed on to the metal, the petals will be close to the flame. Thus, the petals will heat up and conduct the same heat to the bottom where the fat is located. This heat will melt the fat and keep it as a liquid reservoir to feed the wick.
Q2) I am not able to get decorative filler. Is there anything else I could use to make the mold?
Ans: You can use either clay or Plaster of Paris.
Quick tips :
- You could use a cardboard template to get all the petals and stalks of the wax model right.
- When you place the mold in the oven, not much wax may come out. Do not worry. This only means that the wax has either evaporated or got absorbed into the matrix that is porous.
- When you pour pewter into one of the filler holes, the other three also should fill up. This is the proof that you have got your mold right.
Things to watch out for :
- When you are shaping the petals for your wax mold, ensure the symmetry. If the first attempt fails, repeat it. The result will be worthwhile.
- When you stir the slurry to remove the air bubbles, be careful not to damage the wax mold that is in the center.