

Water filters are necessary to achieve clean water at home. But over time, filter cartridges can get clogged with contaminants. Water filters with clogged cartridges are less capable of providing good quality water. If your cartridges are clogged, you’ll notice that your filtered water comes out cloudy and not so clean.
But there’s no need to worry. You can service the whole filtering system, or better, replace the filter cartridges. Replacing filter cartridges is pretty easy; you just need to know the proper steps.Here’s everything you need to remember.
What is a Filter Cartridge?
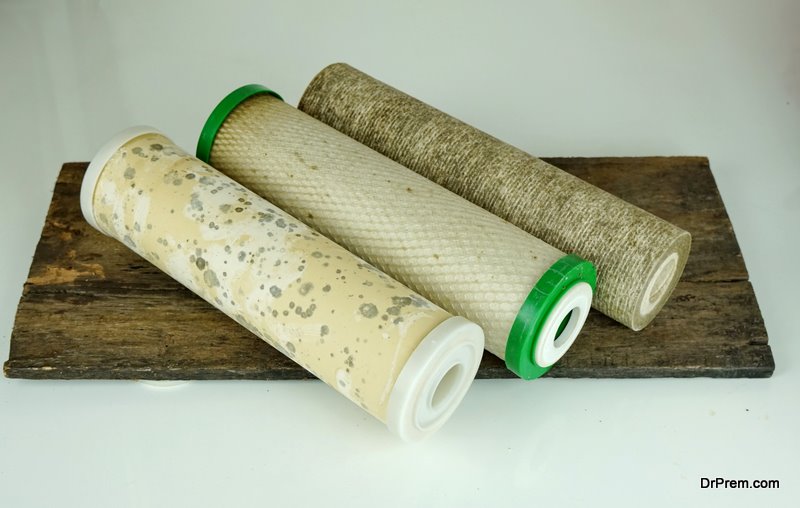
A filter cartridge is a piece of a water filtration system enclosed in a casing/housing. Its multiple pore layers remove unwanted particles, pollutants, and chemicals from water.
Water passes through the cartridges, and unwanted particles get stuck in the tiny pores during the filtration process. As these particles build up, they clog the filter. Eventually, water flow drops and not as many contaminants can be removed. When this happens, a water filter cartridge has to be cleaned or replaced.
When to Replace a Filter Cartridge
The lifespan of water filter cartridges depends on their design and quality.
Top rated whole house cartridge filters are expected to last much longer than other water filter cartridges.
House water filter cartridges come with a general guideline that suggests when they may be due for replacement, which is usually after three to six months. However, the level of contaminants in your water can affect the lifespan of your filter cartridges, too. They may last longer than expected if your water is fairly clean–but they may not last long at all if you have heavily contaminated water. Because of this, it can be tricky to tell when you need to replace your filter cartridges.
Signs Your House Water Filter Cartridges Need Replacement
How can you tell your house water filter cartridges need replacing? For starters, you start noticing one or more of these signs:
- Floating particles in filtered water
- Reduced water pressure
- Slippery water
- Odd water smell and taste
These signs point out that the filter cartridges you are using are clogged and need to be replaced.
Steps to Replacing a Water Filter Cartridge
You can replace your water filter cartridges in five easy steps.
1. Open the Filter Housing
To get to the filter cartridges, you’ll need to open the housing/casing. First, you press and hold the red button on top of the filter. This will release any pressure from inside the filter housing. Then unscrew the filter housing from the filter head using a wrench. Next, turn the wrench in a counterclockwise direction slowly and carefully, and you’ll have your filter housing opened.
2. Remove the Old Filter and Replace it with a New One
Now that the filter housing is open, you can remove the old filter cartridge.
Carefully unscrew the square-shaped wing nuts that keep the filter in place, and then remove the alignment plate/lid from above.
Next, remove the springs and pull the cartridge out.
3. Clean the Filter Housing
Just like filter cartridges, filter housings become dirty from contact with contaminated water. So you want to remove the dirt before screwing the filter housings back on. Clean with warm water and soap, or use a clean wet rag and household bleach.
4. Inspect the O-Ring
Before closing a filter housing, inspect its O-ring. The O-ring is an essential part of the water filter. It’s a small circular piece of rubber that seals the gap between components of the water filter cartridges and prevents leaks.
Inspect it to be sure it’s in the best shape. If the O-ring is damaged, you should replace it. If it’s in good condition, apply food-grade silicone grease. It lubricates the O-ring and protects it from wear and tear.
5. Screw the Filter Housing Back on
The final step is closing the filter housing with a new filter cartridge inside. Screw the filter housing back into place and properly tighten it.
Key Things to Remember When Replacing House Water Filter Cartridges
It’s not enough to follow the step-by-step guide outlined above to replace house water filter cartridges. Here are some things to remember to make your work easier:
1. Be prepared.
Remember to get all necessary tools and supplies ready and close by before starting. It saves you a lot of time and prevents any future mishaps.
The tools needed are;
- Wrench
- New filter cartridge
- Plummer’s tape
The Supplies needed
- Old Towels or rag, for wiping or cleaning things off.
- Buckets to keep underneath the filter while it’s being changed.
- Food-grade silicone grease for lubrication.
2. Don’t panic if your water filter cartridge gets stuck.
It is very common for water filter cartridges to get badly stuck in. After opening the filter housing, the filter cartridge may be stuck and difficult to move.
If you’ve tried twisting with both hands and had no results, then try these methods listed below:
3. Use heat to melt the hard buildups responsible for its lock-up.
Get a hot towel or rag and place it over the stuck filter cartridges. Or, if a blow dryer is available, use it to heat the filter cartridge a little. But try not to apply too much heat. You don’t want to disfigure or damage your plastic filter cartridges or their casing. You can also lubricate the filter cartridge head to loosen the grip
4. Use needle-nose pliers.
Use the needle-nose pliers to pull on the stuck cartridges several times, and after a while, the filter comes off.
5. Turn off the water supply before you start.
Always shut off the filter’s water supply before starting the process. You can turn off the main water supply to the house, or bypass your house’s water filter. Turning off its water supply releases pressure on water filters.
6. Flush out any remaining water before you start.
After turning off the main water supply, remember to flush out all remaining water from the pipes. You can do that by opening the house’s faucets to flush out the water in pipes and filtering systems. Flushing out water helps depressurize the system, making it easier to replace the filter cartridges.
7. While opening the filter housing, place a bucket underneath the filter.
Place the bucket directly underneath the filter before opening the filter housing. This will prevent water spillage and save you from making a mess.
8. Lubricate the O-ring.
Don’t forget to lubricate the O-ring. You must lubricate both old and new O-rings with harmless lubricant (food-grade silicone grease).
9. Check for leaks.
Lastly and very importantly, after every replacement, check for leakages. Slowly open the main water supply and check for leaks in the water filter cartridges.
If you have trouble replacing your house water filter, apply these tips to replace your filter cartridges easily and continue enjoying clean water.