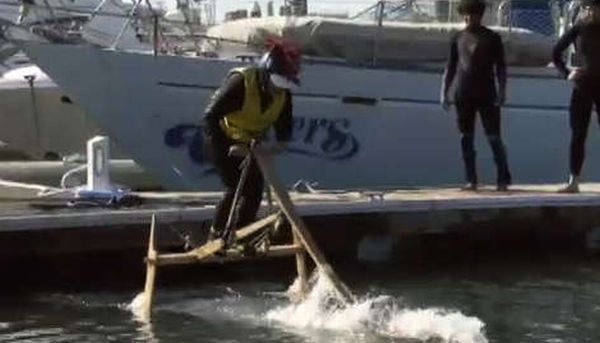
A hydrofoil comes with an element of fun and can pump necessary adrenaline. How about crafting one at home in the ecofriendly way? It can be easily made with the help of wood and a few other, easy-to-be-found, materials at home. So, collect all the materials and bring them together for an amazing experience in the form of a human powered wooden hydrofoil.
Difficulty level: It ranks âMediumâ on the difficulty level.
Time required: It varies from person to person.
Resources Required:
- Wood
- Paint
- Nails
- Epoxy
- Thin birch plywood
- Dust catcher
- Bamboo skewers
- Glue
- Hammer
Things to keep in mind:
These steps are easy to follow and donât need elaborate instructions. But, while working with a hammer and nails you need to be a little careful. Be sure that you donât get hurt while using them.
Procedure
Step 1: Anatomy of the Hydrothopter
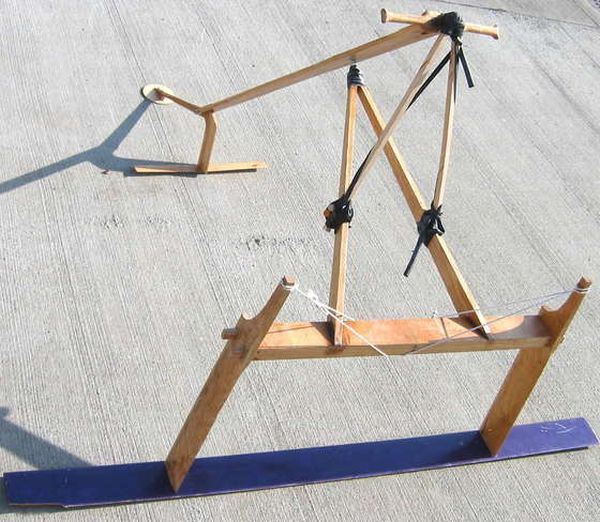
Fix two uprights to the crossbeam carefully. The eyebolt and handlebar will have a fork with two hinge lashings. Take the four frame sticks and attach them to it. Surface feeler is shaped in the form of a disk and is positioned at front. This hops on the surface of water and is made out of wood.
Step 2: Parts
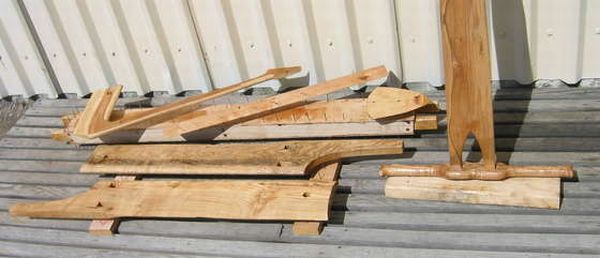
Take all the wooden parts and cake them with paint. Let them dry in the sun so that they get heated. A crossbeam is present at the stern, where you will see nails protruding out. These nails will aptly hold the front wing, strut, and surface feeler.
Step 3: Crossbeam
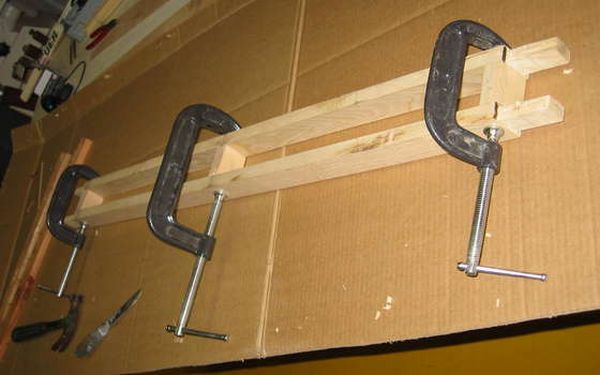
Take two small-sized ash crossbeams and with the help of birch plywood and epoxy fix them together. To ensure that the ash parts remain in place, use a few copper nails. After the epoxy dries, carefully pull out all the nails.
Step 4: Main Wing

The bolt holes should be placed at a distance of 48 inches. Be sure that the main wing, crafted from fir board, measures 87.25 inches in length, 5.5 inches in width and must have a thickness of 0.717 inches. Make sure it has smooth surface and is devoid of any knots. The foil will be given a flat underside for better usage. Use ends of the boards to draw the shape of foils and make sure they turn out to be smooth.
Step 5: Uprights
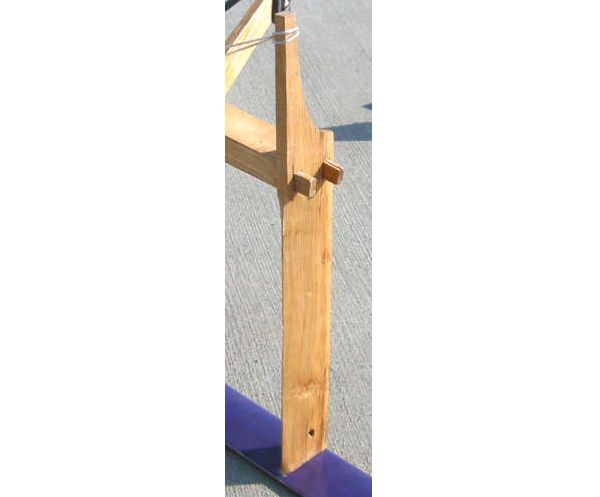
The uprights measure 0.95 inch in thickness and has a 5 inch chord. It has been crafted from ash wood and resembles a hockey stick. Carefully, attach two mortises to the crossbeam. Now, drill two holes: one at the bottom (vertical hole), which will allow bolt through the wing and the other in a horizontal direction for nut plus bolt screws.
Step 6: Front Fork and Handlebars
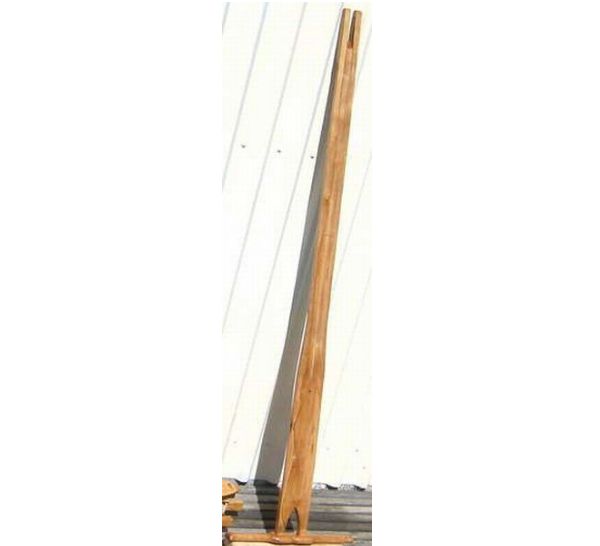
The front fork will also be made from ash wood. It will have a thickness of 0.9 inch. The front fork will have a width of 3.95 inch at the top, which will merge with the handlebars. With a length of 66 inch, it reduces to a width of 2.2 inch as it reached the bottom. A hole for the eyebolt will be drilled at a distance of 19 inch below the uppermost part of the handlebars.
Step 7: Canard Assembly
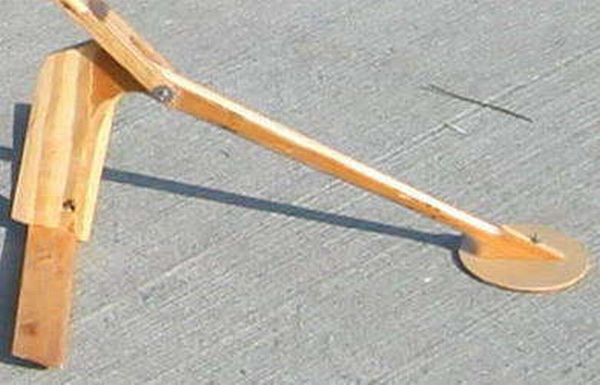
The canard wing has been crafted from maple. It should be 25 inch long, 0.28 inch thick and a there should be a chord measuring 2.4 inch. Just like the main wings, attach the strut with the help of nuts and bolts. A 6 inch plywood disk will be used to make the surface smooth. The canard wing will have an upward inclination of 5 degree, when it is 3 inch off the ground.
Step 8: Frame Stick and Setup
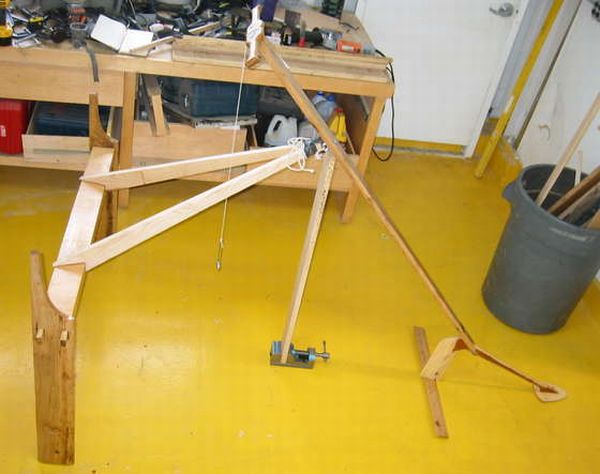
With the help of a plumb bob, place the handlebars at a 22.5 inch horizontal and 32 inch vertical position from the back edge of the crossbeam. Mix epoxy with pieces of fiberglass cloth and wood dust to fix the crossbeam and frame sticks. This was further attached with the help of hinge lashing on the front of the eye bolt. One can also use a bicycle inner tube for this.
Step 9: Top Hinge Ashing
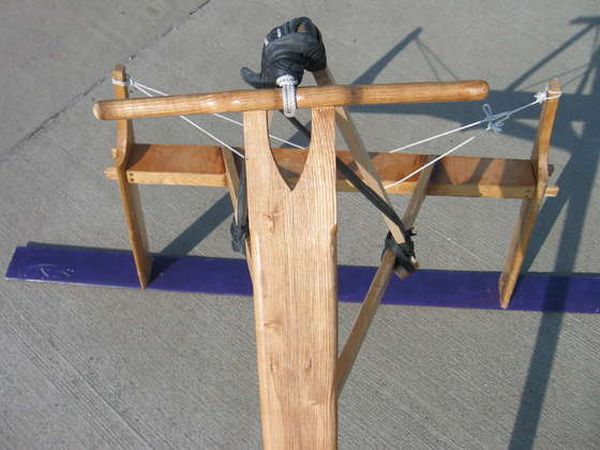
The frame was completed with two additional bicycle innertubes. It will blend well with the whole frame and work aptly. The slim area on the handlebar will be covered with a cord, while the top of the frame sticks will get a big ball of innertube lashing.


