


Over the years we have seen some interesting and innovative uses of solar energy. Exhibiting yet another ingenious use of solar power is the solar-powered radio. And what’s even better is that you can make it yourself for just $5. So, what are you waiting for? Read the procedure, make a solar-powered radio and enjoy the melodious green music.
Difficulty level
Easy
Time required
About 2 hours
Estimated cost
$5
Here is a look at the material required
• You will require a radio which is portable.
• Red and black cable having 6″ lengths along with a soldering iron.
• We generally prefer a BAT43 schottky type diode but a silicone INI4001 can also be used.
• A solar panel of 4.4v 80mA.
• Two batteries with min capacity of 800 mAh per battery. Make sure these are rechargeable.
Things to keep in mind
• We should be very careful while using a screwdriver.
• We should be very careful while making it as in making procedure we use electrical instruments also.
Procedure
1. A solar panel having 8 strips should be chosen. It should give out an output of 4.4v 80mA.
2. Take out the plastic lens as well as the metal rim off the garden light. It does not require much effort, easily comes out. The panel should be very cautiously separated from lights body as it is glued. After cutting the connector wire, the panel must be taken off completely.
3. Removal of the rear panel plays the first step in establishing a connection of a radio. A positive or negative terminal can be easily verified with the help of a multi meter.
4. Join the red and black wire after you drilling a hole in plastic to ensure the wires exit from the back of the panel, when the job of reassembling has been done.
5. IN4100 OR BAT43 type blocking diode must be taken in use in order to join the positive terminal with the solar panel. The latter type of blocking diode is way better, as it gives the benefit of the least voltage loss. Especially when considering 3 batteries. The reversal of current coming from the battery is averted with the help of a diode. This happens generally when there is low light. The black and white bands should not face toward the solar panel by any chance. A multi meter can be brought into use for verifying whether the connection has been done in the right manner.
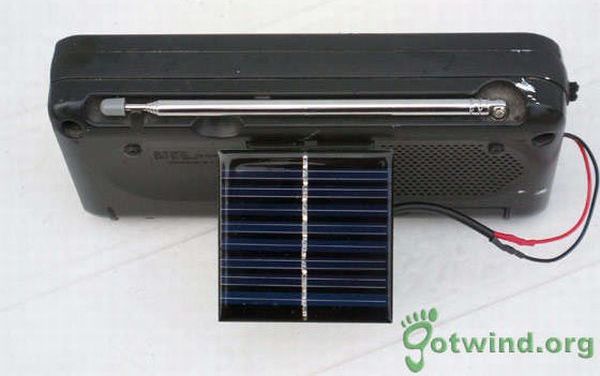
6. At the end the solar panel can be easily placed on the radio (centrally) with the help of easily available adhesive tapes.
7. Insulation tape can be used to jacket the bare joints if any, after the positive and negative terminals have been joined properly.
8. Your radio is ready for use, it consumes no energy. Holds the capacity to last forever.